
— layout: post authors: [dimuthu_daundasekara] title: ‘Install and Configure Captive Portal with FreeRADIUS on pfSense’ image: /images/pfsense_captive_portal/captive_portal.jpg tags: [pfSense, Firewall, Captive Portal, WIFI] category: pfsense comments: true categories: - “pfsense” - “Captive Portal” —
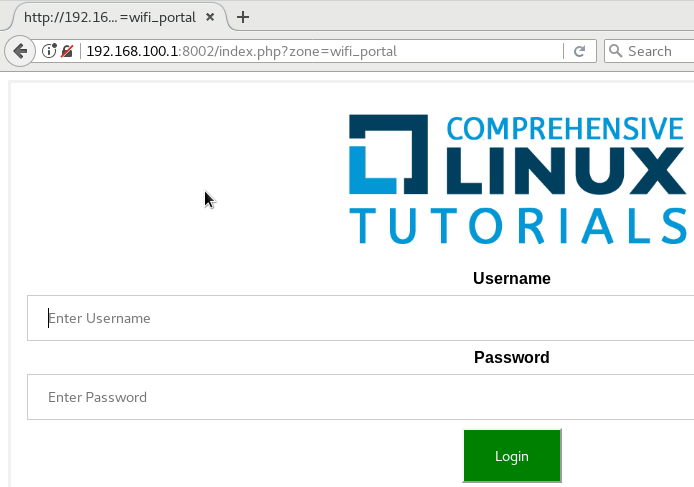
Captive portal is use for authenticated users to grant internet access. Firewall automatically captive portal authentication login page which users must use their credentials to enter the portal. User can use Username/Password or a voucher code.
This setup is commonly used throughout the hospitality industries like Airports, Hotels, Restaurants and corporate environments.
The Captive Portal function in Pfsense securing a network by requiring a username and password via portal access web page.
Pfsense built-in user management, LADP, RADIUS can be used as an authentication server.
In this tutorial I’m using FreeRADIUS2 as an authentication server.
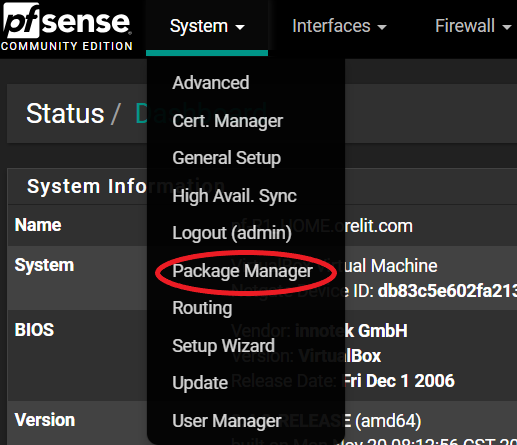
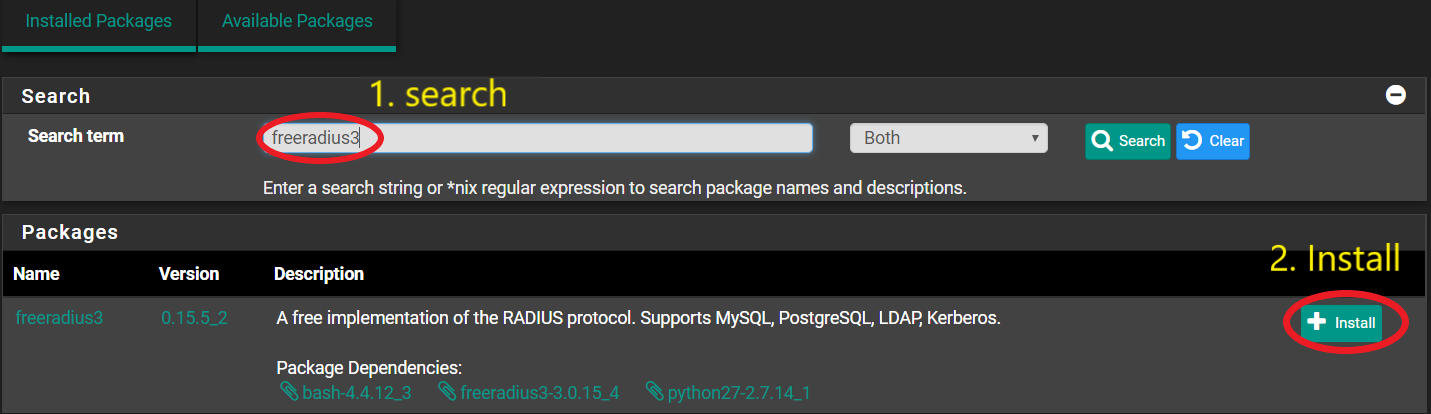
Navigate to System > Package Manager, Available Packages tab

Click at the end of the row for FreeRADIUS3
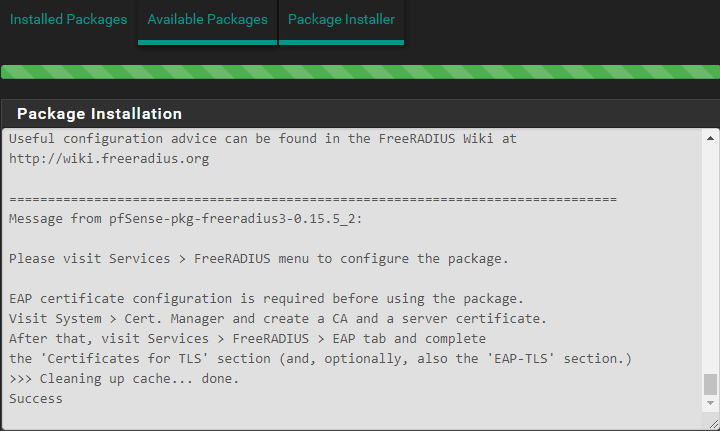
Confirm the installation
System > Package Manager > Available Packages
[Search Item] = freeradius3
Navigate to System > Cert. Manager
Create a Server Certificate
How to create CA and Server certificate is available at…
Navigate to System > FreeRadius, EAP Tab > “Certificates for TLS” section
Provide CA and server certificate that we have generated at previous step.
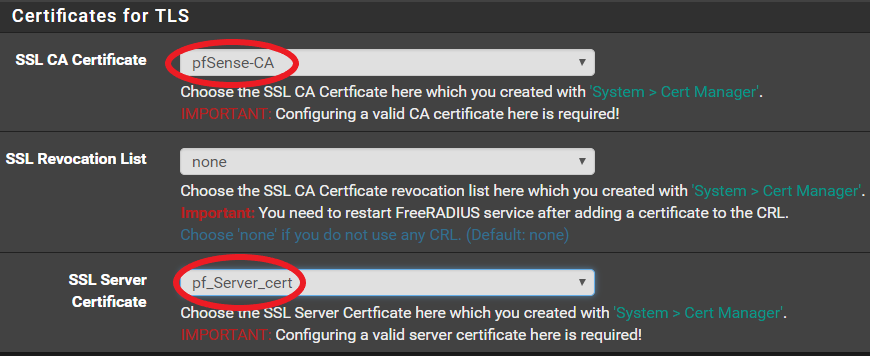
Save the changes.
Add a new interface on which the RADIUS server should listen on.
Navigate to System > Services > FreeRADIUS, Interfaces tab
Click  button
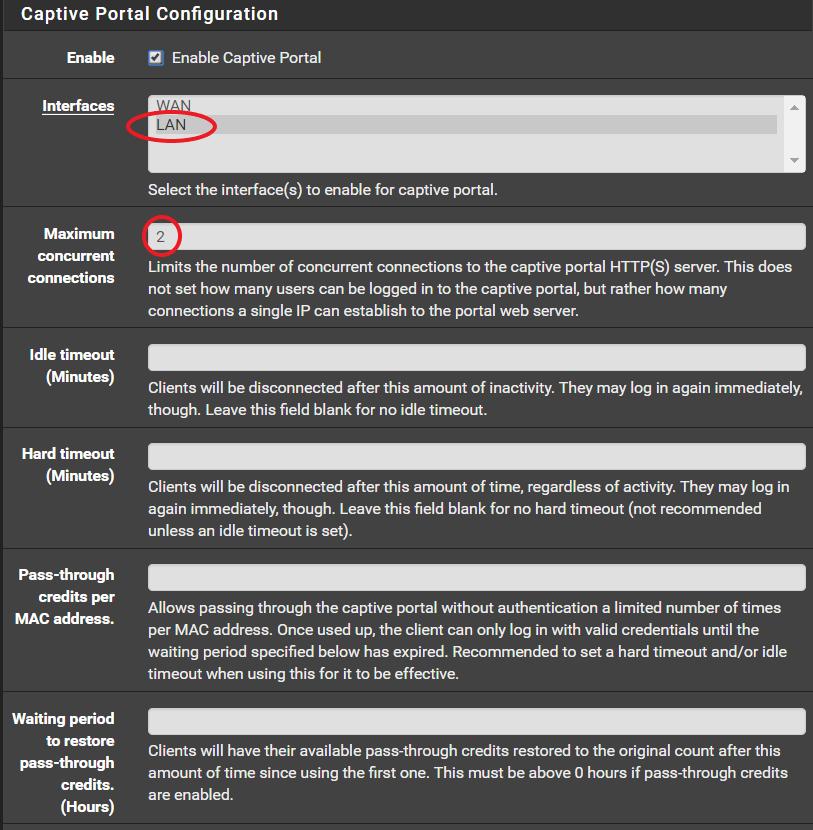
In this case I’m using my LAN interface (192.168.100.1) for RADIUS server to listening on.
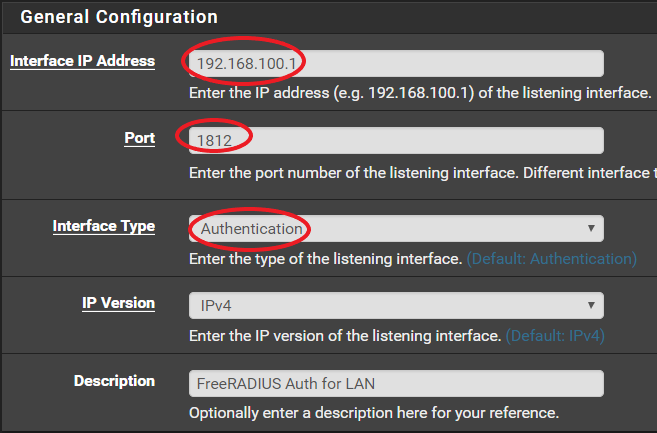
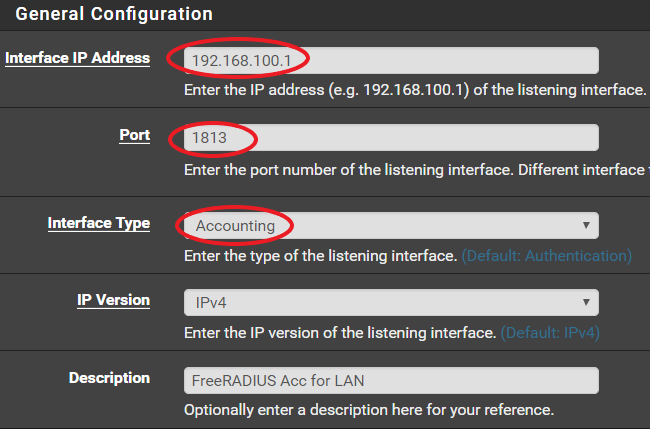
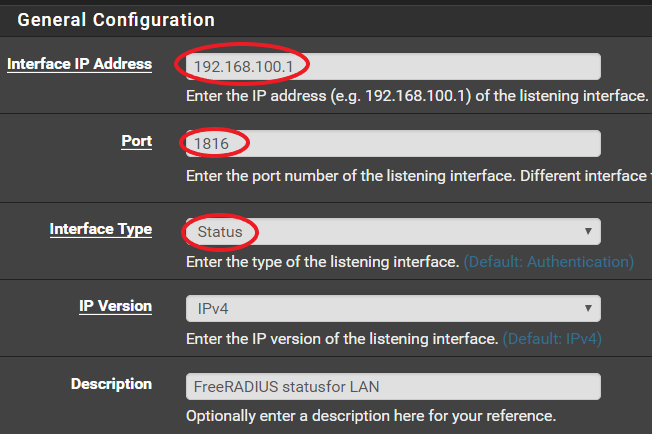 Save and exit.

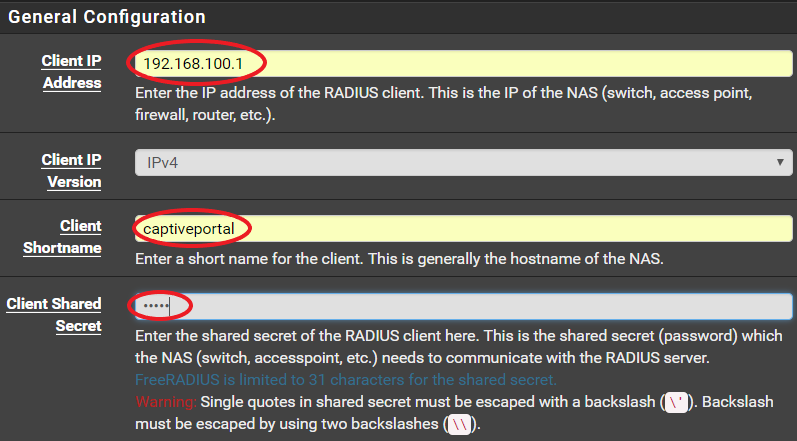
Configure the NAS/client(s) from which the RADIUS server should accept packets.
In this step you need to give the IP address of the device which you want to authenticate from radius server like a firewall, access point, switch and router.
In this step I give my Pfsense box’s IP address because I will use the Pfsense captive portal.
Client IP Address : 192.168.100.1
Client Shortname: captiveportal
Client Shared Secret: 12345
Reset of the settings can be leave default.

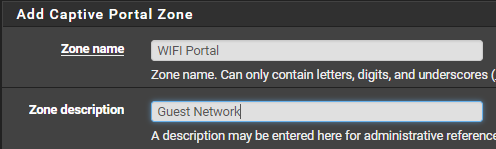
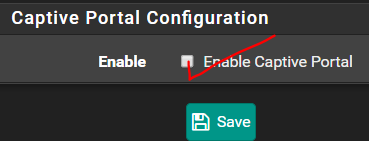
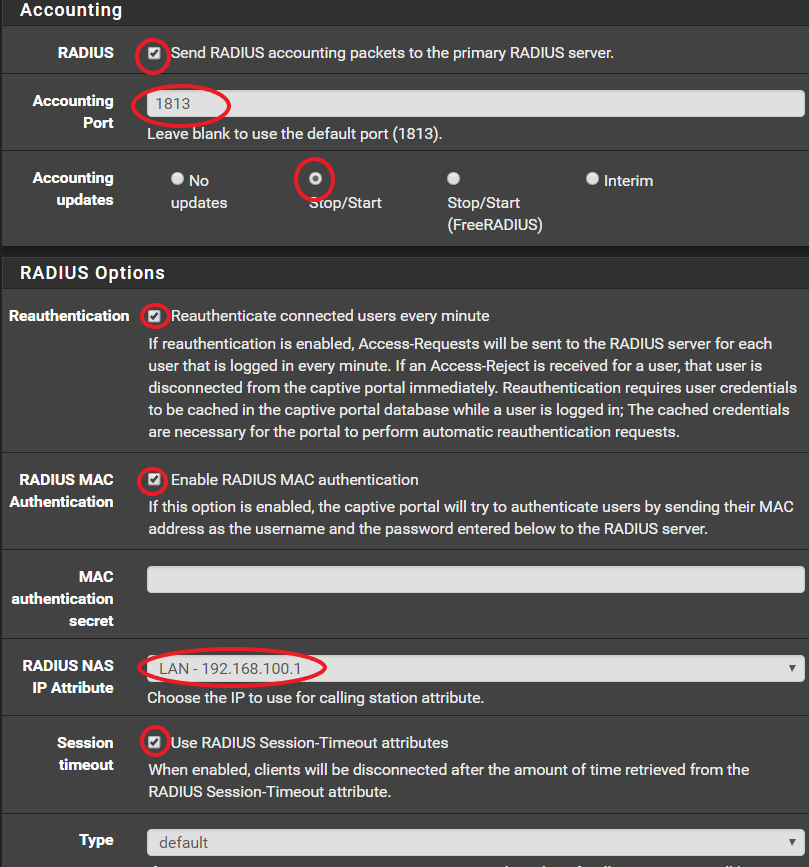
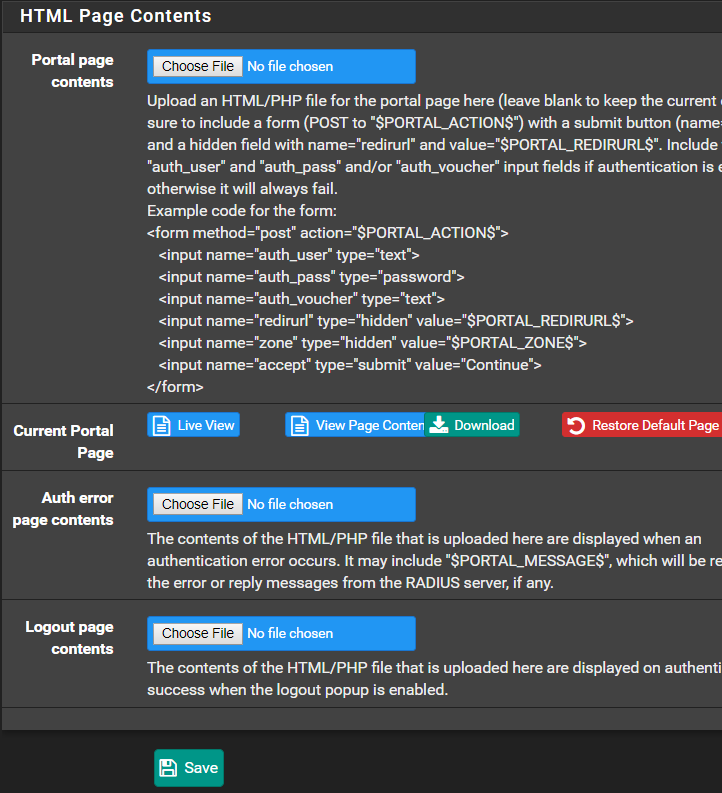
Navigate to Services > Captive Portal
Click ““ button to add new zone.


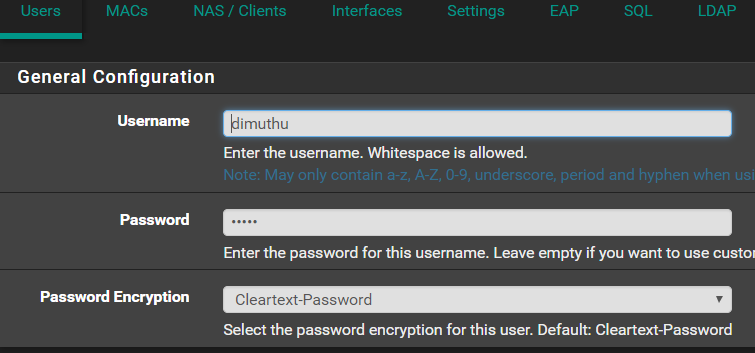
Navigate to Services > FreeRadius, Users tab.

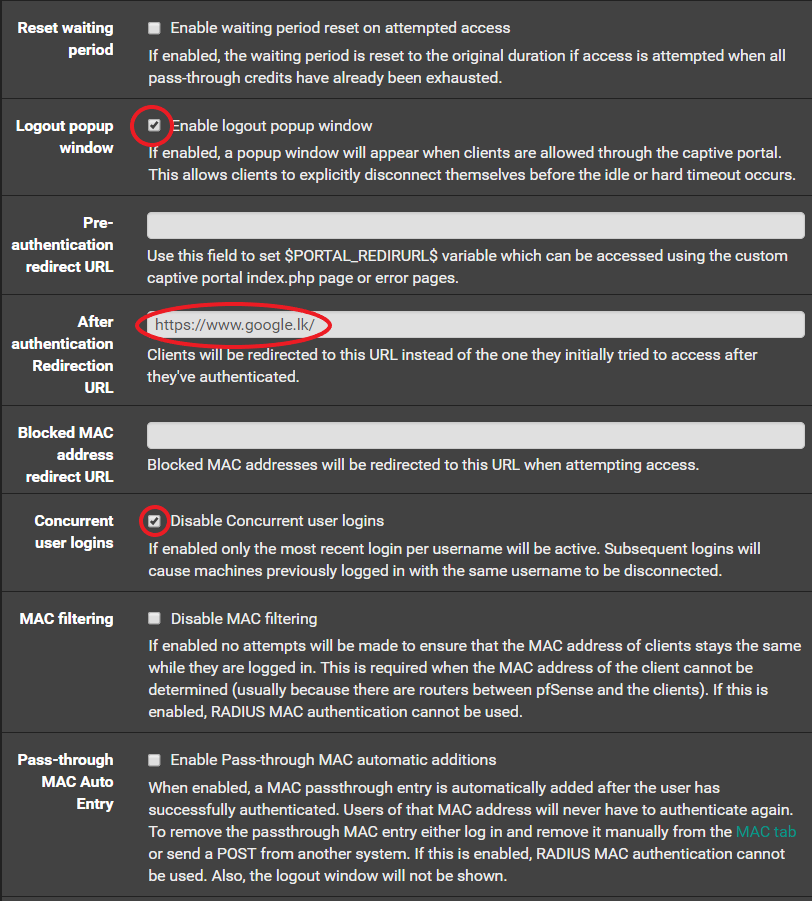
All the other settings can be change upon to your requirements.
Little Request:
I appreciate you guys taking the time in reading my post. Please check out my YouTube channel and please subscribe for more as it’ll help me loads.
https://www.youtube.com/channel/UCovlVsoRVItner26ZJPBjmQ/featured?view_as=subscriber